| Project TurboR Progress Reports |
Well as Usual Project TurboR progress at my usual frantic rate, In 2004 very little was achieved of my original goals, so i've decided to do this page as a motivation to see what i have achieved and to keep me going. Hopefully this project will actually progress a bit faster than it has done since i started it way back in 1999.
Anyway the first mod of 2004 was to bring the car back as my current daily driver whilst the estate takes a break.
This bought up one problem, the car allready had a Superchip ECU to support fueling to around 16psi but was still stuck at stock boost around 6psi. So to remedy this a Blitz Dual Solenoid Electronic Boost Controller was aquired.
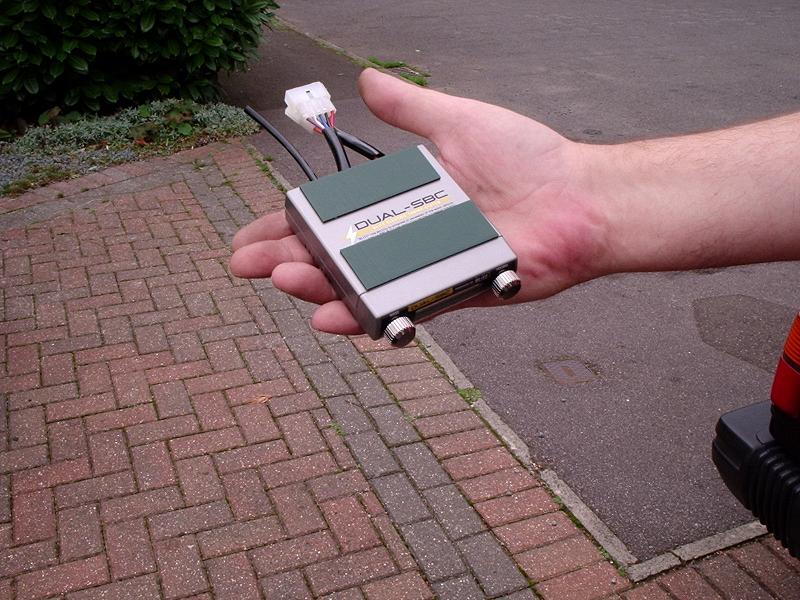
Now we had in car boost control and it was fantastic, i could go from pootling around at 6psi flick the switch and be pushing 16psi. This was great but it soon put a lot of pressure on the poor T3 unit. The night before a rolling road session the Turbo decided to expire spectaculary whilst i was fine tuning it. Click on the vid below to see the turbo faliure.
How a T3 Likes to Destroy itself at 17psi
Anyway a spare 2nd hand T3 from a parts car was slapped on and the car was running again and the car ran well as i was able to change the blowing exhaust manifold gaskets.
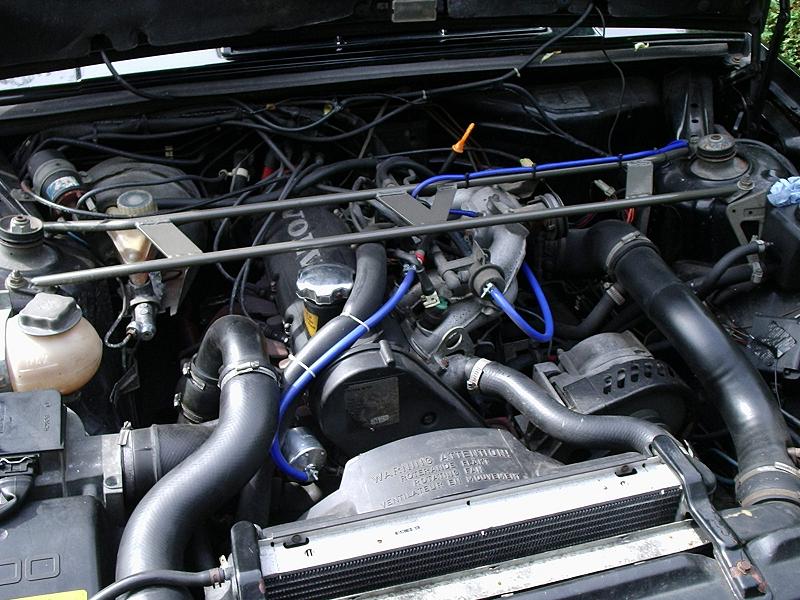
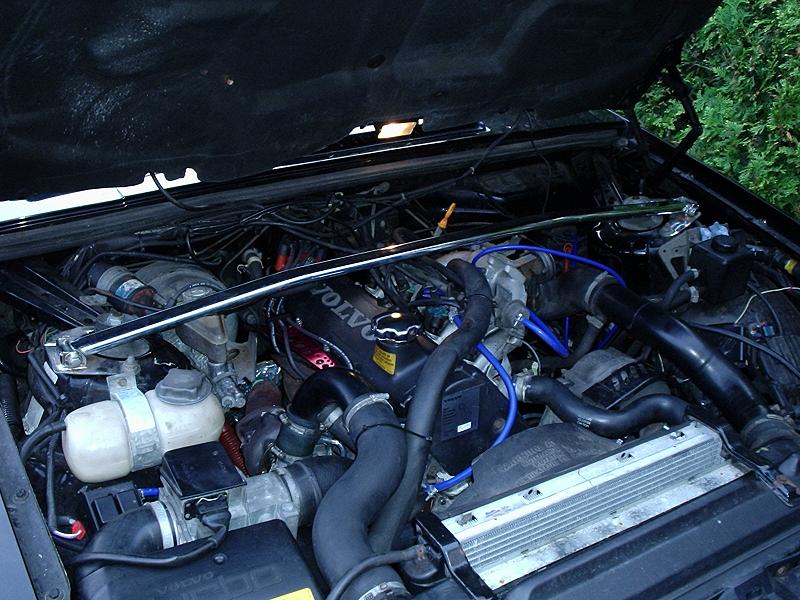
I imported a Strut Brace that was made by a fellow T Bricker in the USA, John Sargent. Awell made product and seems to tighten the front end up.
Not much else really happened in 2004 for the TurboR really, MOT time came and the usual problem of sticking front brakes was debated with the examiner. But after a few small repairs, New Handbrake Shoes, replacing the missing rear exhaust section the TurboR was deemed Roadworthy again.
2005 The TurboR Story continues.
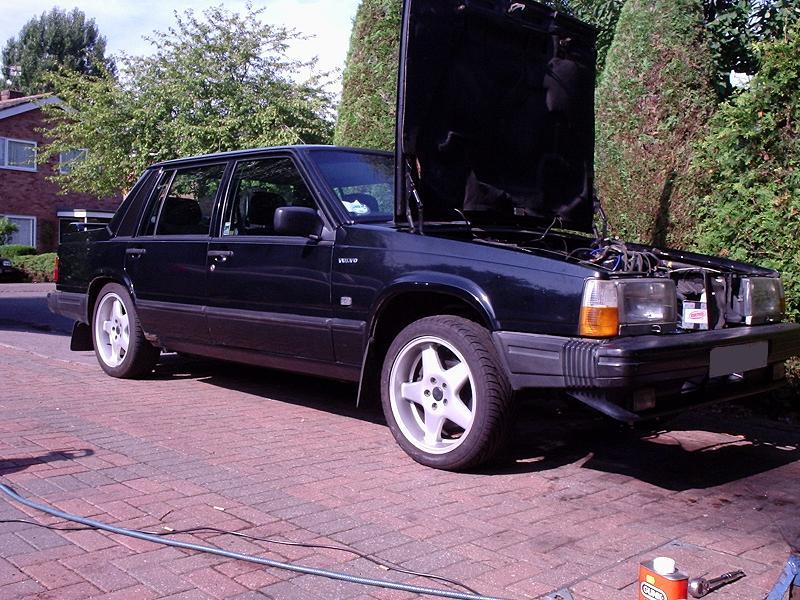
I finally got hold of some Polaris Rims, i'd only been searching since 1999 for a set. Good price and with some decent Falken tyres on them to boot.


Towards the End of January i decided having missed last years Rolling Road session due to Turbo Failure to take the car for a diagnostic session to see what power it was kicking out and to check the fueling was good whilst at cruise as i'd been getting some terrible MPG's.
The TurboR at least decided to give me some notice before throwing a fit. The clutch started slipping the weekend before it was due on the rollers. So now was an ideal time to put the M90 Gearbox that i'd bought over a year ago in the car.
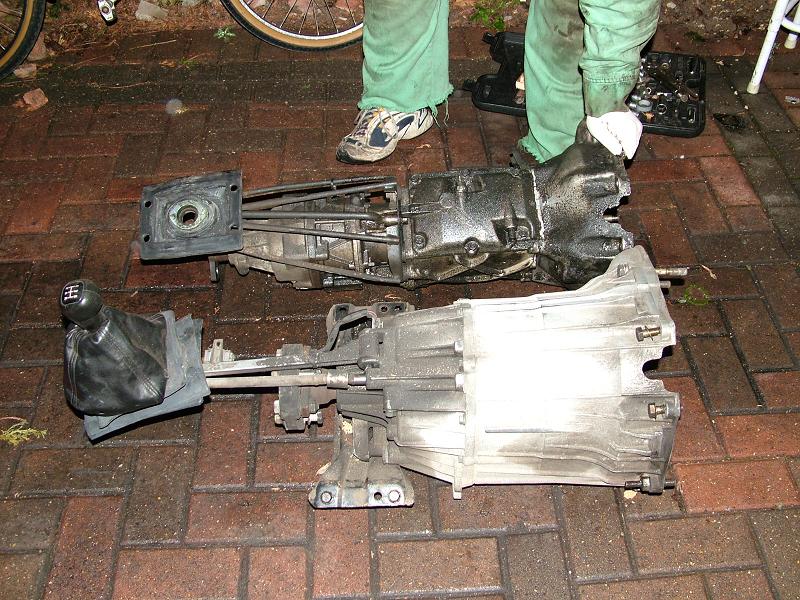
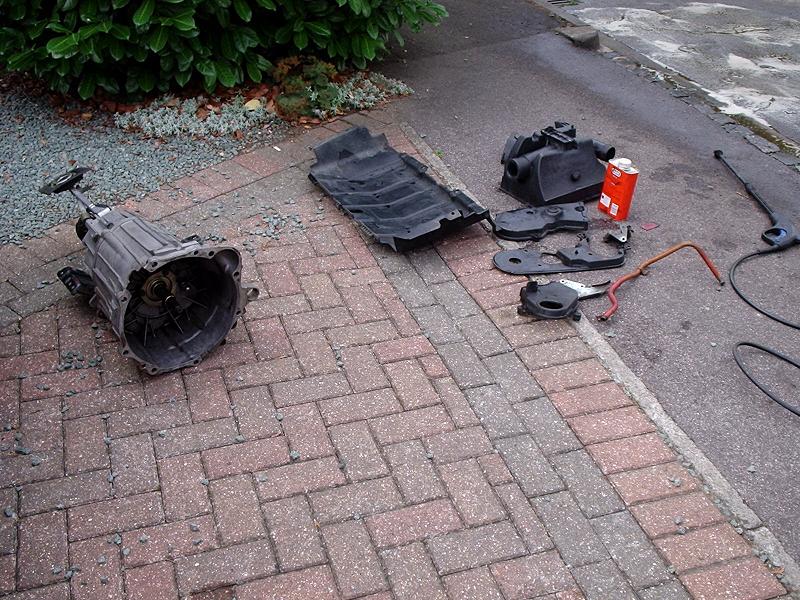
Heres the Two Boxes Side by side, the M90 is at the front with the old M46 in the background, it was a nice easy swap and no more difficult than swapping in another M46 or just doing a standard Clutch Change. The M46 had started to whine anyway in 3rd gear under boost and overdrive was a bit of a hit and miss anyway.
Anyway with the M90 installed the car was transformed, instead of feeling quite dated to drive, the car now felt quite modern, the M90 changes gear very smoothly and is a lot quiter. Also by using the M90 Prop i killed the other problem in that the M46 Propshaft centre bearing was knackered anway.
Its also nice to know that it has a reputation to handle the power the TurboR should be making sometime later this year.
Anyway so the Rolling road session came around and on she went onto the rollers. Click on the vid below to see the Run.
Well the run highlighted some problems that i thought exsisted but wasnt to sure about. Fueling was spot on, but my Dump Valve was opening up under boost and causing a fantastic boost leak and robbing the car of making good power. In turn this was causing the turbo to work harder. This in turn meant that the Seals on the turbo are failing again and it wont be long till the turbo fails again. As i was doing the power run and as the revs rose so did the oil pressure, the seals were forcing the oil to spew out of the turbo feed pipe and dump oil all over the hot turbo.
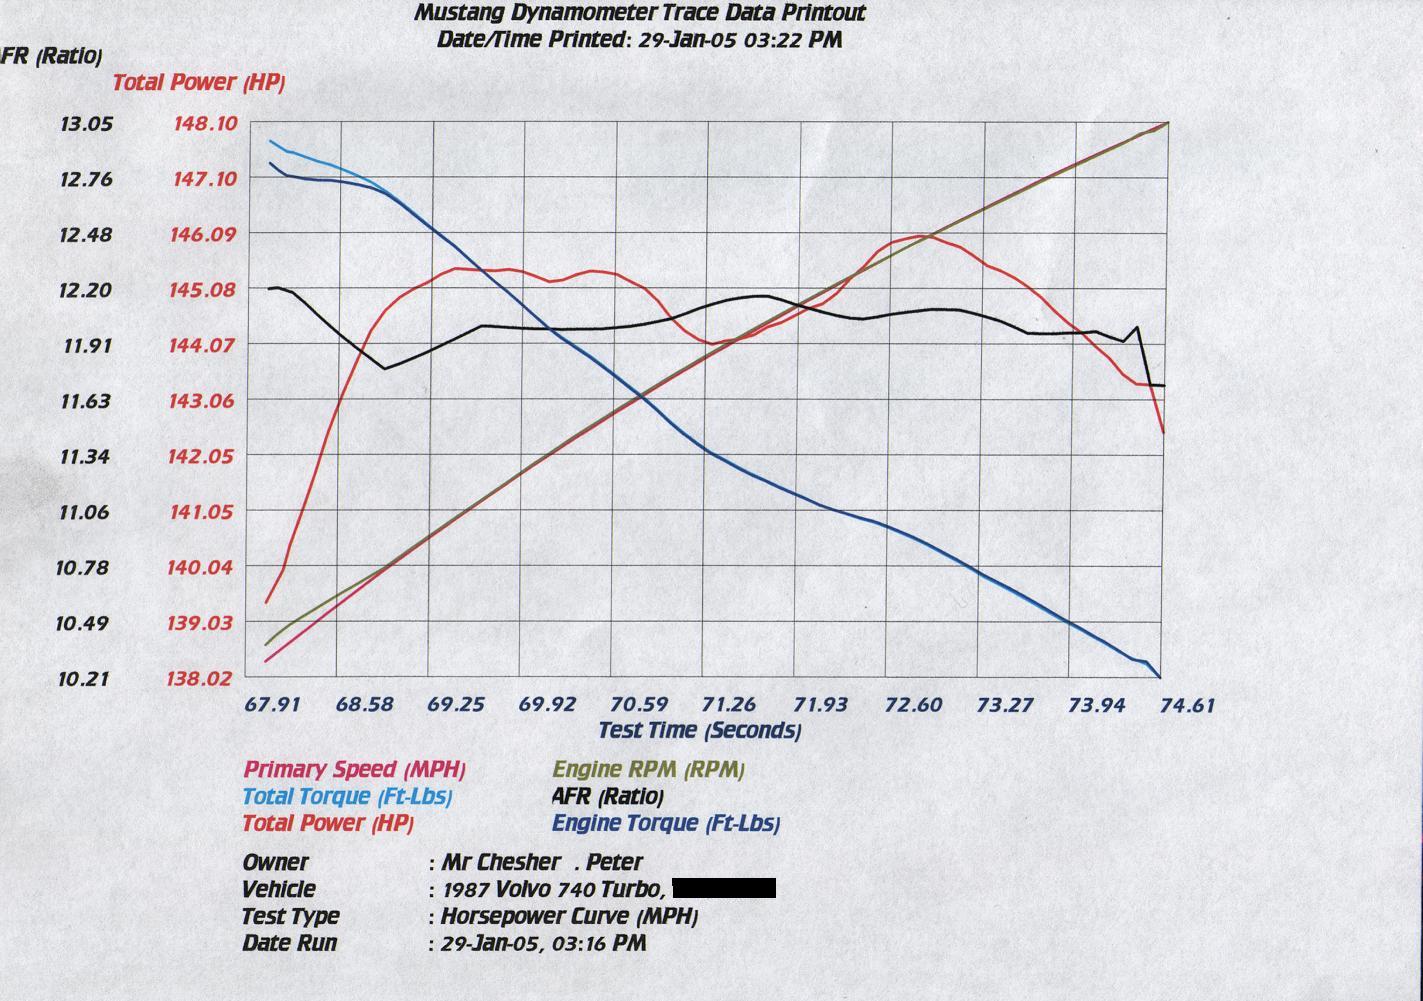
Here's some of the dyno prints from the day. The first one is the Diagnostic run through the gears.
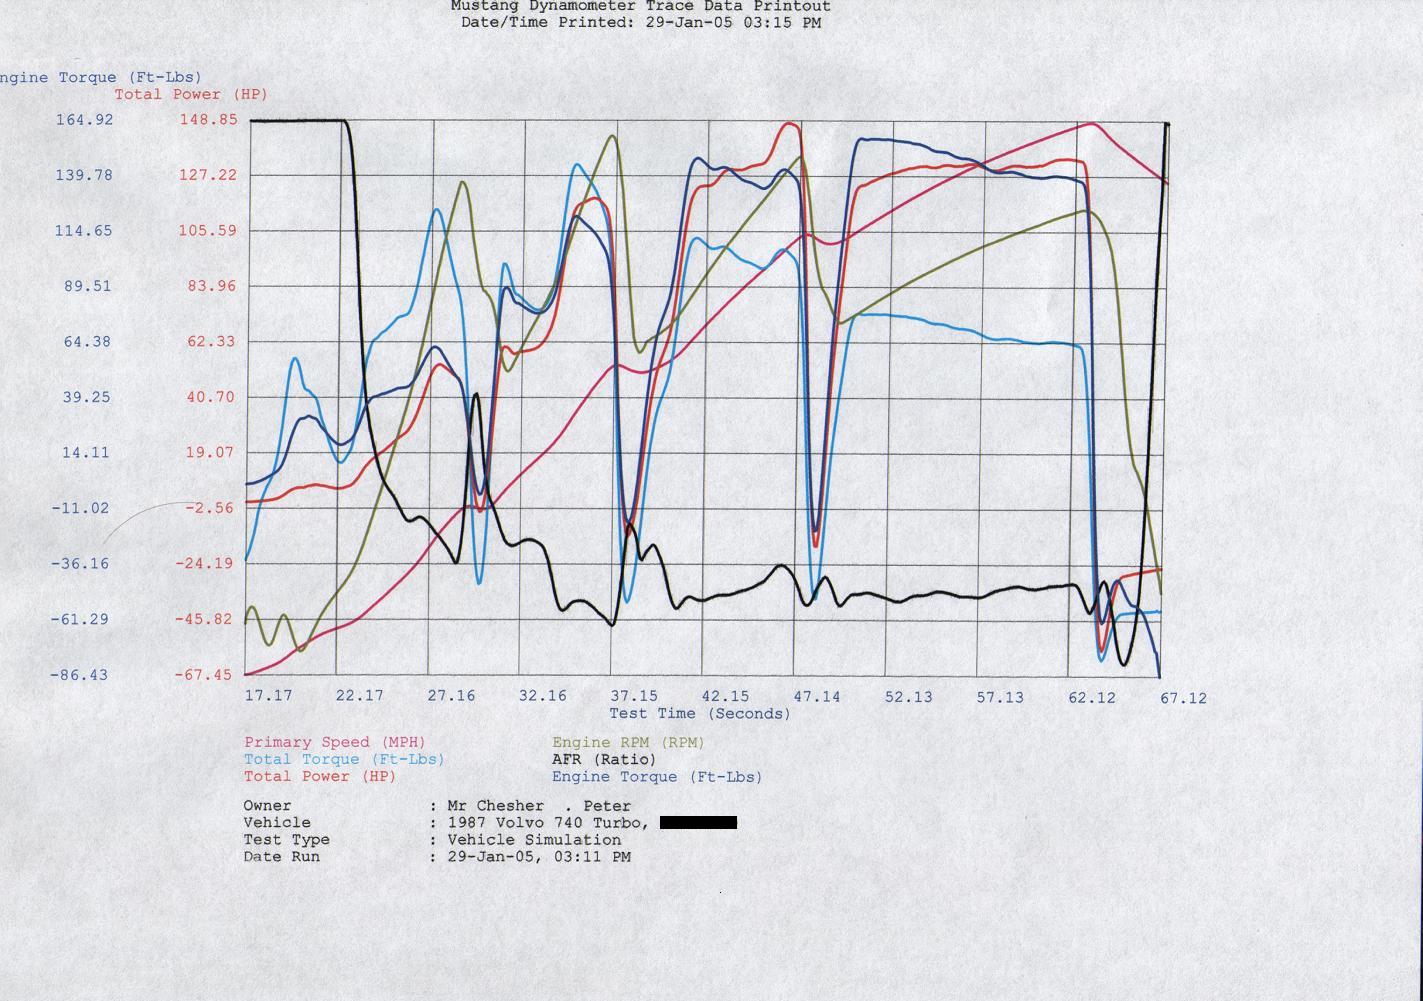
And this is the Power Pull done in 3rd Gear, 146BHP at the Rear Wheels.
March 2005
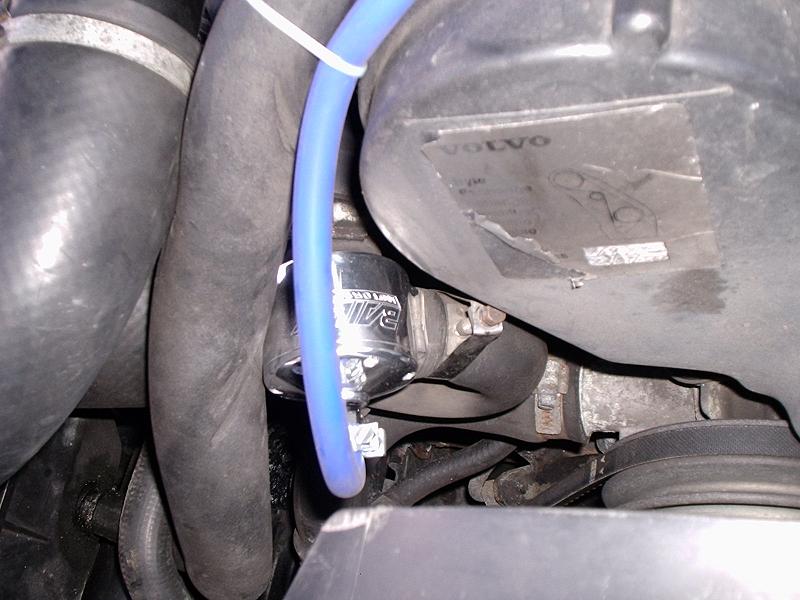
A Baileys Motorsport DV30 Recirc Valve was bought and installed to replace the old Baileys Dump Valve that was the cause of the boost leaks. I kinda miss the Pish noise now but the car is a lot faster now. I had to turn the EBC settings down 10 points once the DV30 was fitted, so the boost leak has been well and truly cured now.
So The current list of items to obtain now are a Larger Intercooler to bring Charge Temps down and a Hybrid turbo to provide better boost capabilites and also bring down IAT's down.
September 2005
The Great Engine Build Finally Happens!!!!!!!!!
Day 1
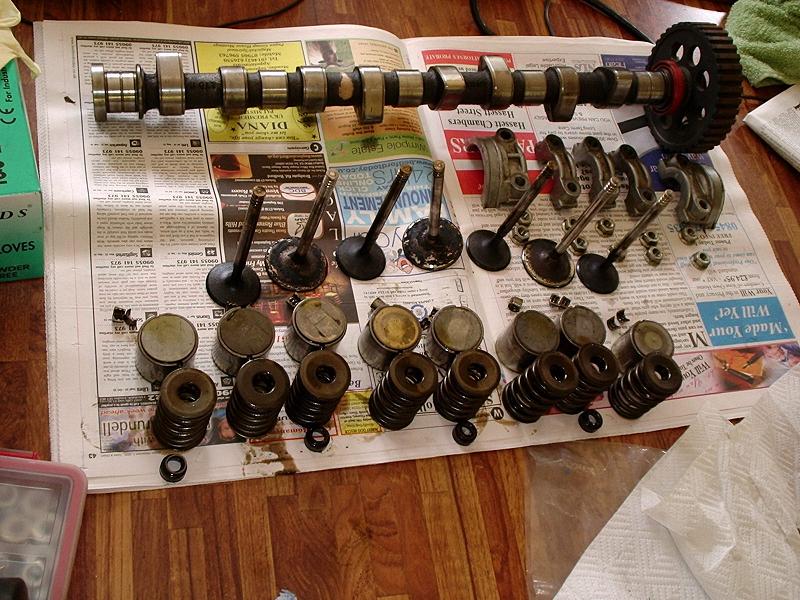
Started the Day stripping the worked over big valve 531 head i bought some 3-4 years ago from a guy that now runs a 12 second 1/4mile 740 PRV V6 turbo. The story goes that he spent a considerable some of money getting the head worked over. This was all back in the day when I didn’t know SPM parts existed or Turbobricks.
Stripped the head down removing, all the valves and also the exhaust studs.
Strangely I had to tap all the valves out as where the collets go they were tight going through the stems. Never had that problem on other heads I’ve done, but talking to some others this is quite normal on 531's.
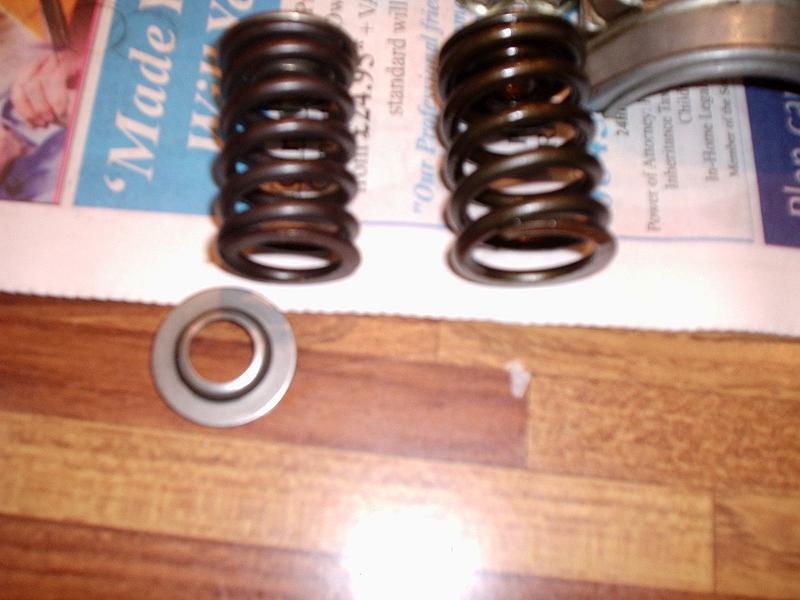
All the components out, I will be putting fresh Stem seals in, new valve springs, and exhaust studs.
Spent a few hours with the dremmel and a wire brush and cleaned the head up
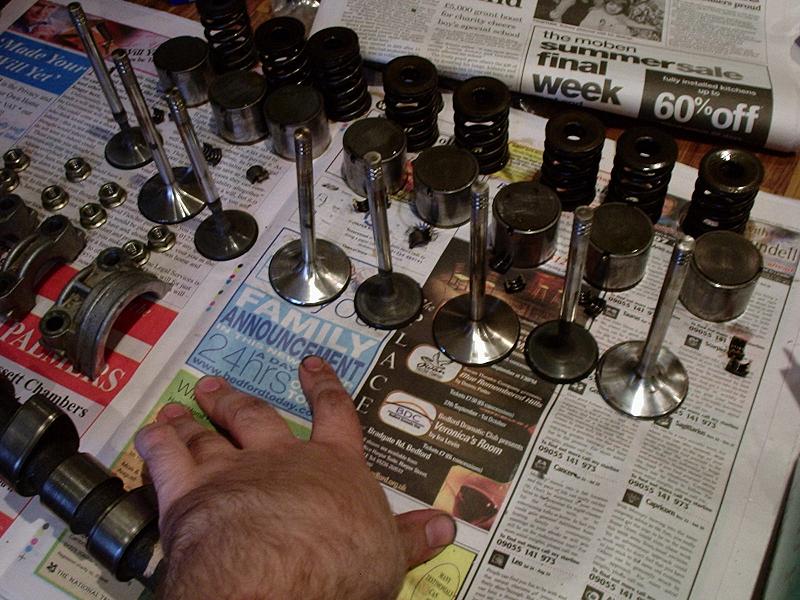
Measured the valves up and they are indeed, 38mm Exhaust and 46mm Inlet in Size, stock sizes are 35mm and 44mm respectively.
Stuck them each in the drill and cleaned em up, the intake valves came up pretty well and I think a little bit more polishing should get them really shiny, but the exhaust valves don't seem to be coming up so well.
Day 2
Bit of a delayed start today, woke up around 12ish, i blame my mate foggy as somehow we managed to discuss boost control till around 5am this morning.
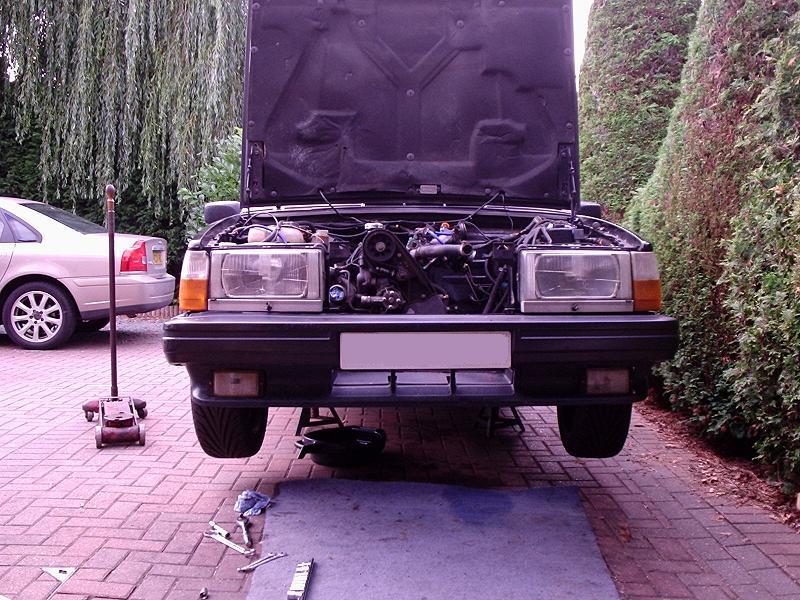
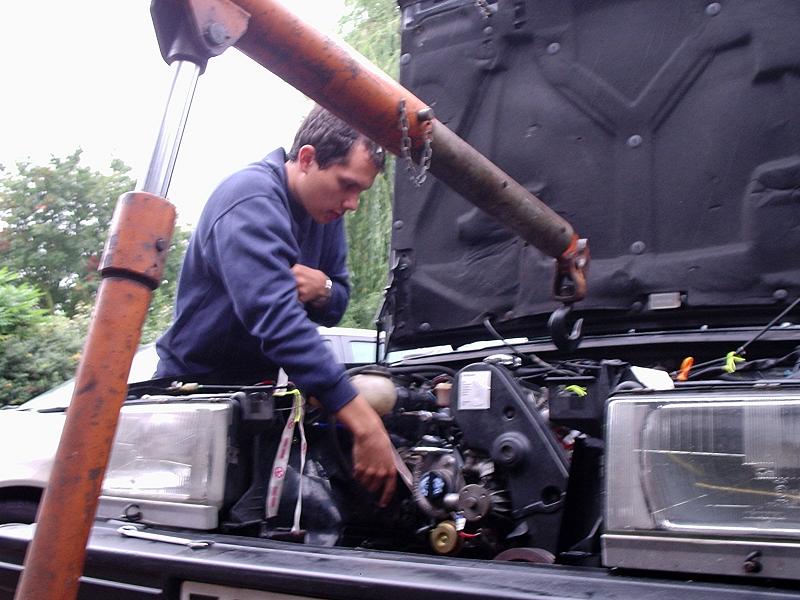
Started around 12.30ish by looking under the bonnet of the TurboR, drinking a few cups of tea and smoking a few fags to psych myself up.
Couple of hours later, pretty much everything that can be done from up top is disconnected.
This cars are so damm simple to strip its actually a pleasure. The last engine pull i did was a FWD volvo and that took nearly a day of stripping to be somewhat near close of pulling the engine.
I was quite amazed how damm tough these engines are, i went to drain the coolant and basically there was only perhaps half a radiator's worth, never spilt a drop anywhere there was that little.
The worst part of it all has to be the Wiring Loom, thats gonna need some repairs once the engine is out of there, and i'll do a few mods as i think i'll swap in a 100amp alternator.
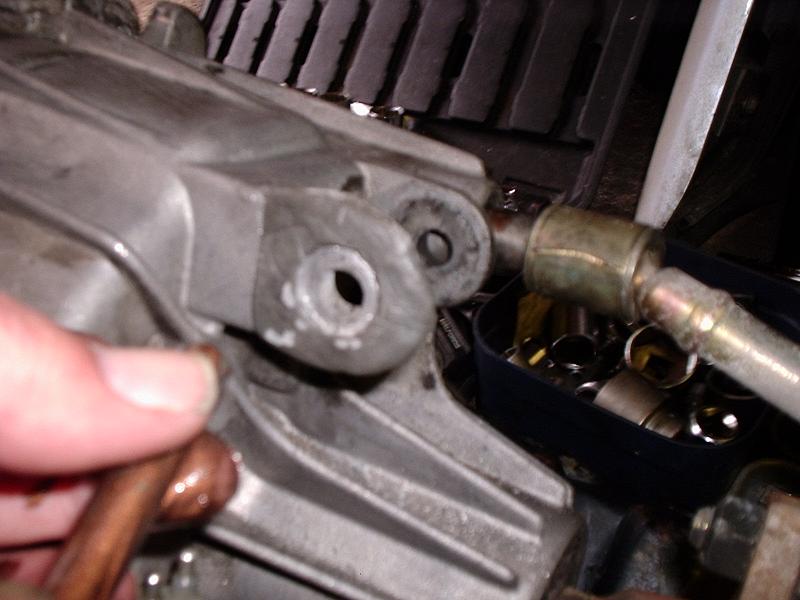
All thats left to do now, is Jack it up, put it on some stands, drain the oil, disconnect the Power Steering pump. Undo the Oil Cooler lines, and remove the clutch slave cylinder, then the whole shooting match can be pulled out.
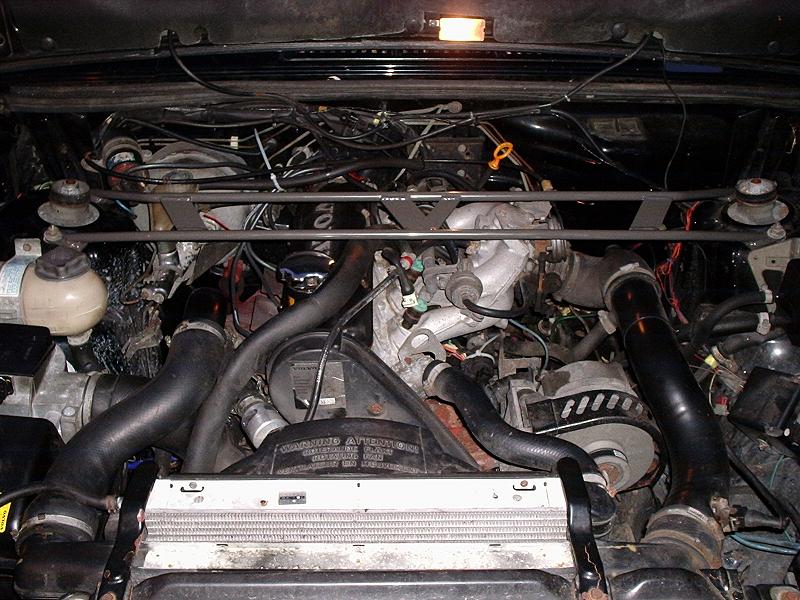
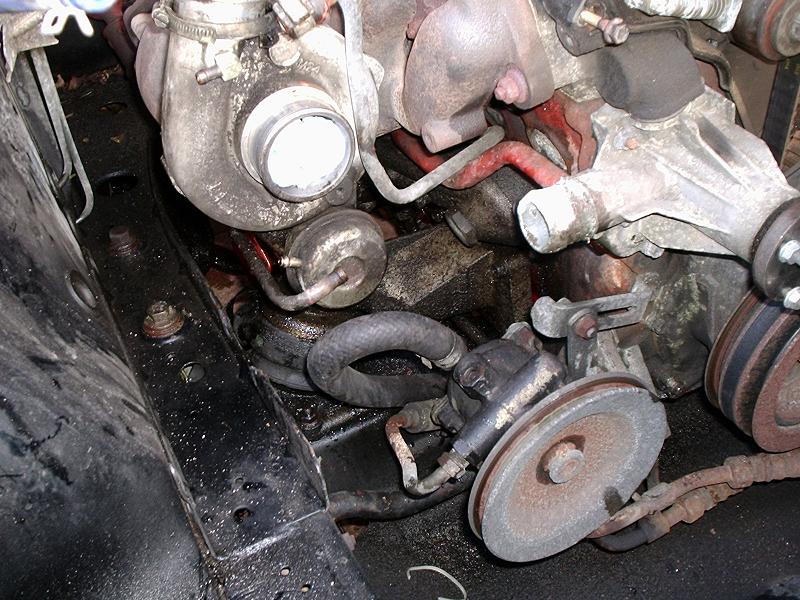
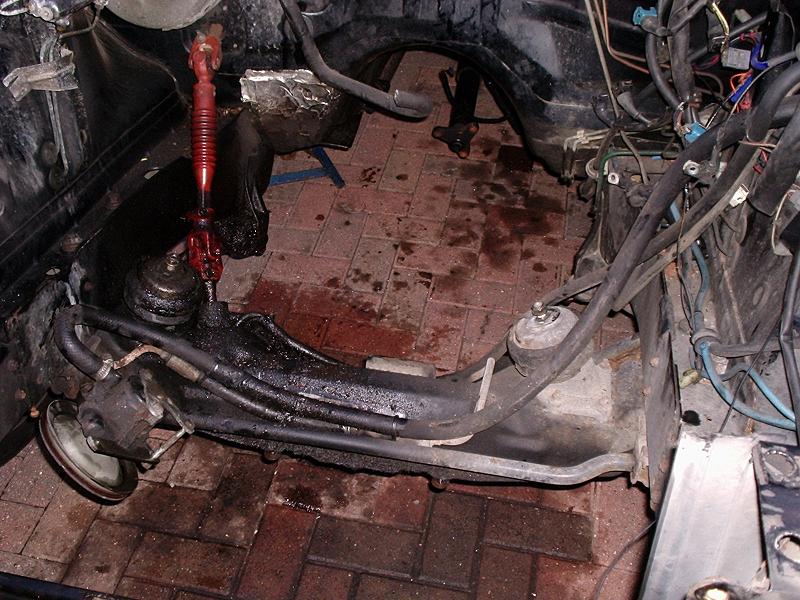
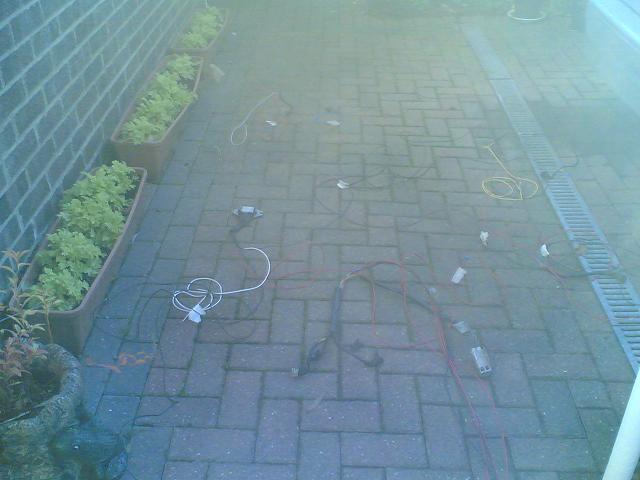
Will be so nice not to have all the oil leaks like the ones below, the old T3 was certainly chucking its oil out under boost!
and now that my valve grinding stick has arrived, i'm going to spend the evening lapping in the valves and reasembling the 531. Pics to follow later.
So at around 2am last night i finished lapping all the valves in, strangely when i went to install my new valve springs, i discovered that this head has had some uprated springs fitted, so i decided to keep them. So if anyone wants some brand new 531 valves springs, i have em for sale.
So DAY 3 comes about, another parts run for the last bits i needed, my wallet takes another hit, but surely its worth it.
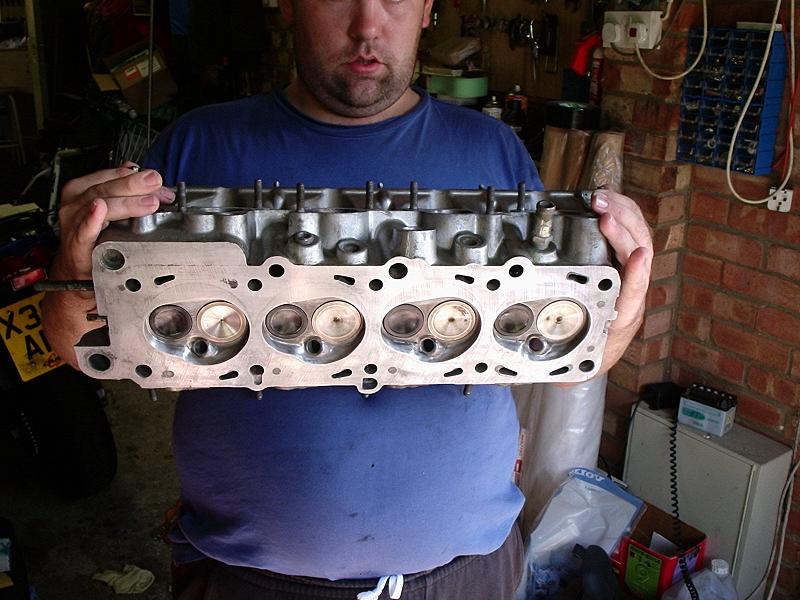
The head about to go on, the exhaust valves didnt clean up any better, so there going back in as they ended up.
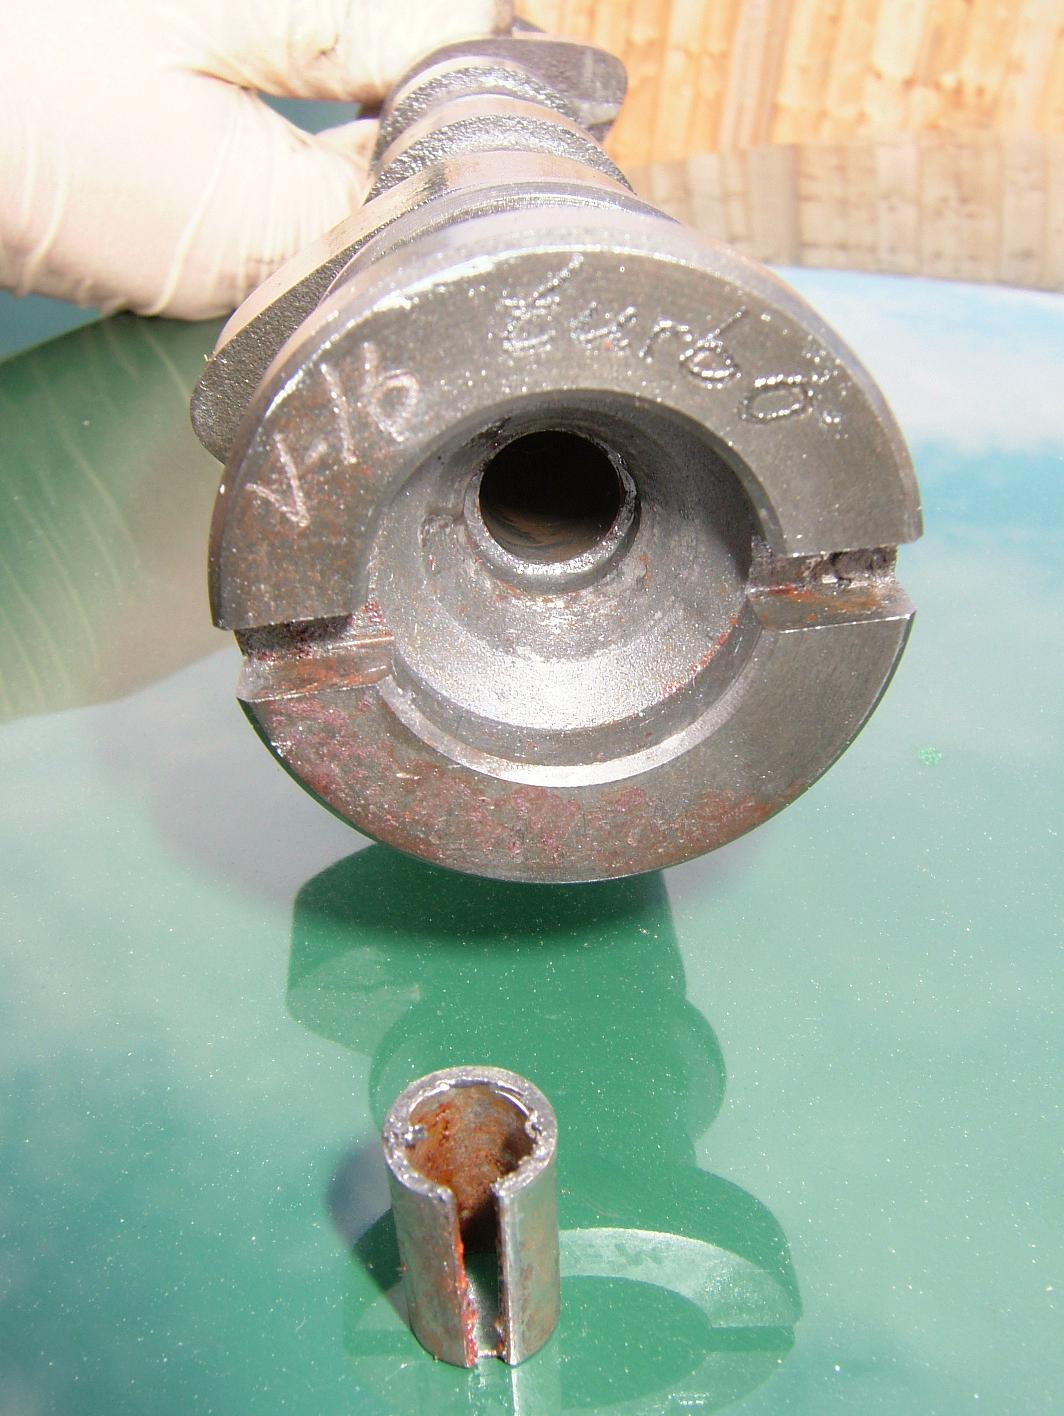
I then set about finishing the sump gasket, which i tore off so that i could install a Auxilery shaft that will run a block mounted dizzy in preparation for MS&S.
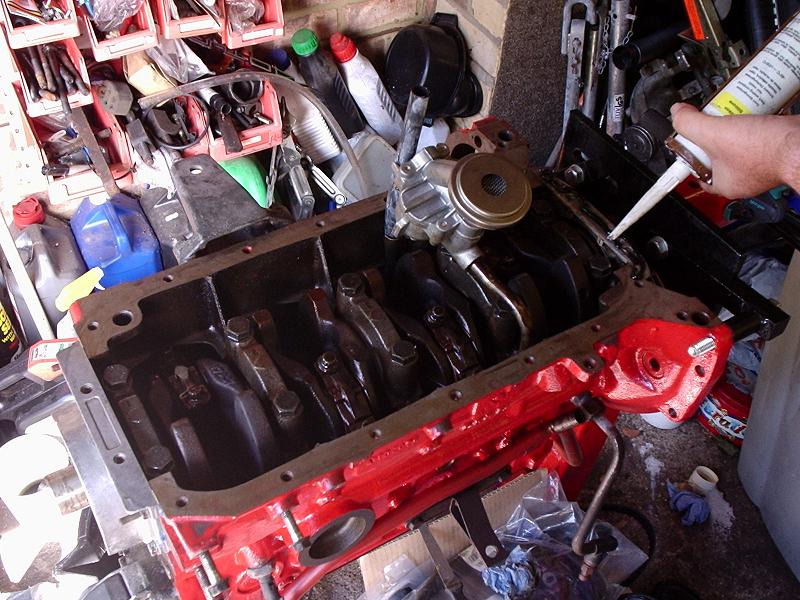
As to the specs of the block, welll its old school baby, its basically 13mm rods, with B230ET pistons, new bearings, shells, oil pump, slightly bored out (1st Oversize), but nothing worth writing home about, no piston oil squirters, or any of that clever crap.
I then bolted the head down onto the block, as to where the pic of that is i don't know!!!
I then moved onto extracting the old engine from the car,
AND WHO SAYS I NEVER USE AXLE STANDS EH!!!!!!
A bit of jiggery pokey and the whole lot came out gearbox as well.

I then spent some time, splitting the gearbox of the back of it, now i'm sure when i installed the m90 it had a full complement of engine to gearbox bolts, i only recovered 3 bolts holding the lot together!!!! I think i'll use some locking compound this time!!!!
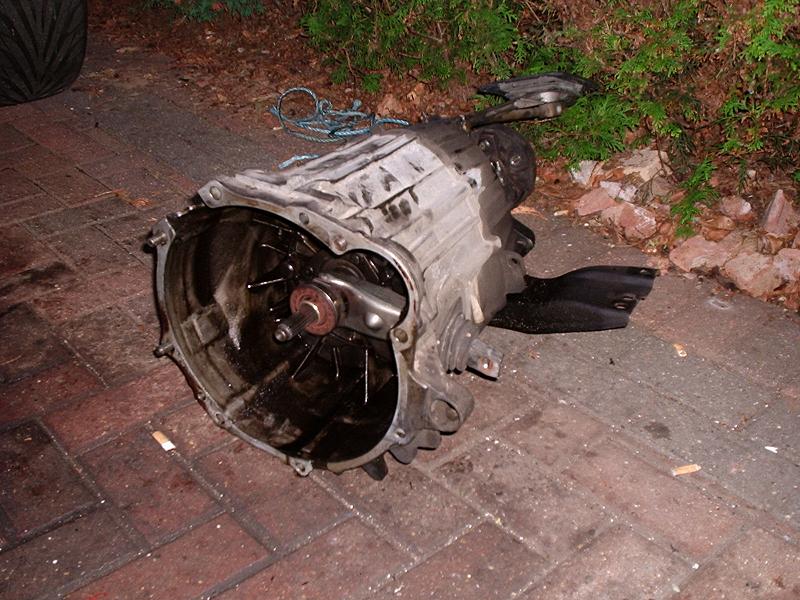
One dirty m90 needing a good clean
I then stripped the old engine off all the ancilleries i would need, like the motronic flywheel sensors, Head Mount dizzy etc etc. I then removed the old 531 to put into storage seeing as its quite a valuable piece of kit.
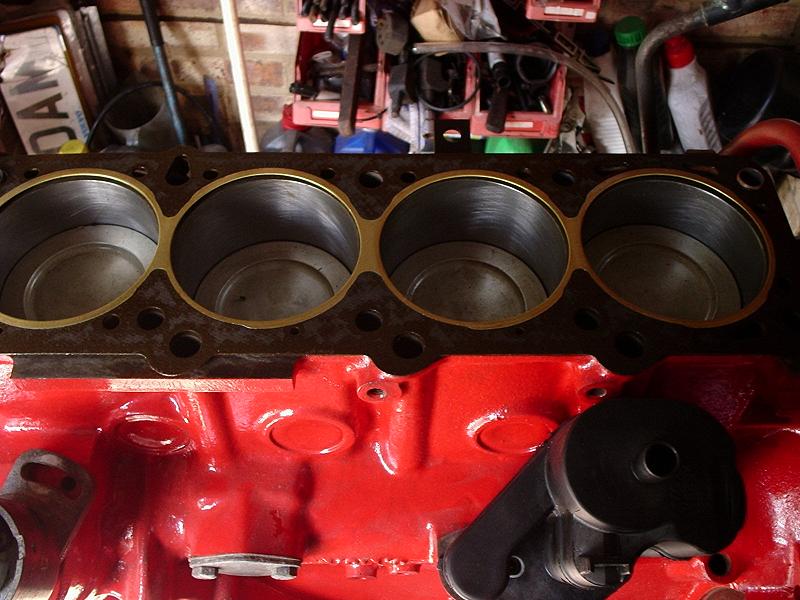
The old block looked in damm good shape, not much of a lip at all if any for 197,000 Miles!!!
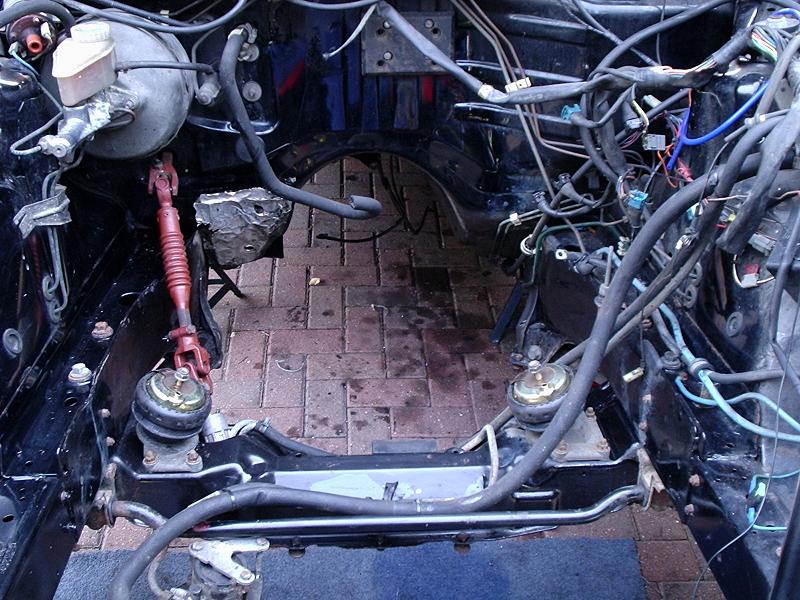
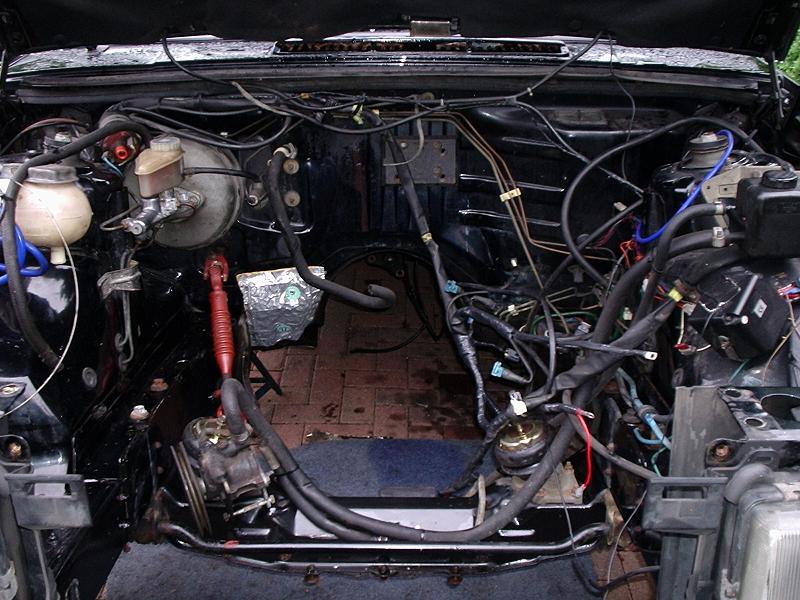
So tommorrows job is to clean up the very dirty engine bay, as seen below as the old engine did half like to leak its oil all over the place.
Then i guess i need to clean up the ancilleres i removed and install on the new engine, then hopefully drop the lot back in, leaving saturday to connect up everything
And Day 4 begins with one mighty hangover from drinking way too many pints in the pub last night.
So i roll the car into the street and get the gunk out and brush it into the engine bay, bit of pressure washing later and voila its not come up to bad.
I let it drip dry for a while then pushed it back on the drive and wirebrushed up any rust and then repainted, also i installed 2 new engine mounts.
I then seem to spend quite a good part of the day cleaning bits that have 17 years worth of oil grime on them.
I give the M90 a good degresasing as it seems a shame to bolt it up to a nice new clean engine.
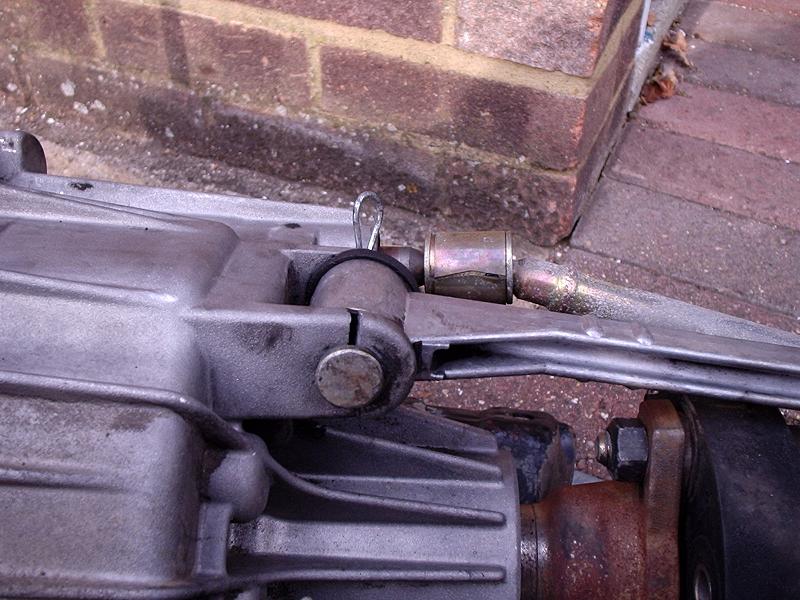
I discover an inheriant weakness with the m90, which i'll have to address tommorrow.
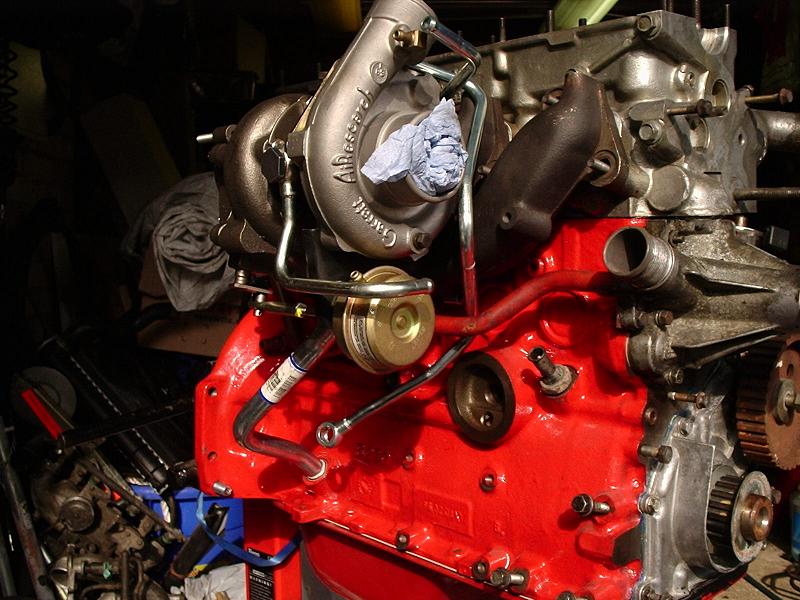
I then spend some time going through my large box of volvo gaskets, digging out the parts required for the turbo.
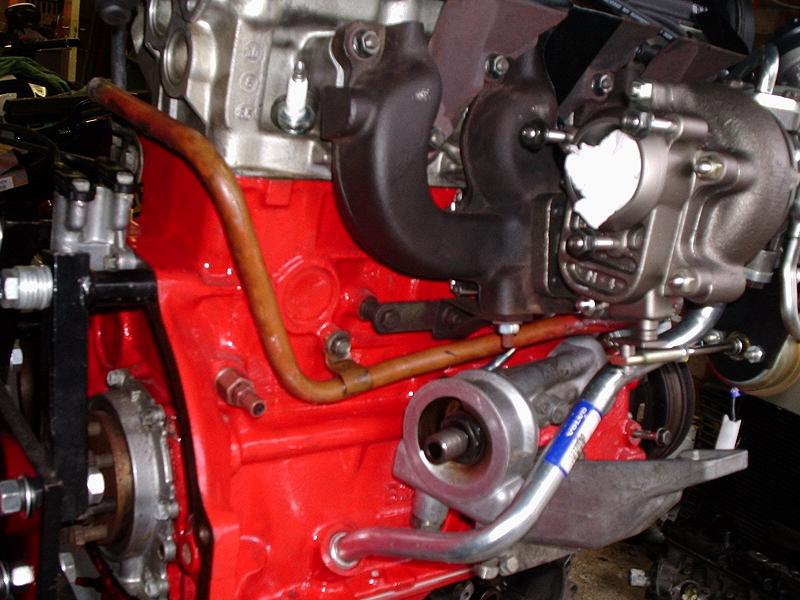
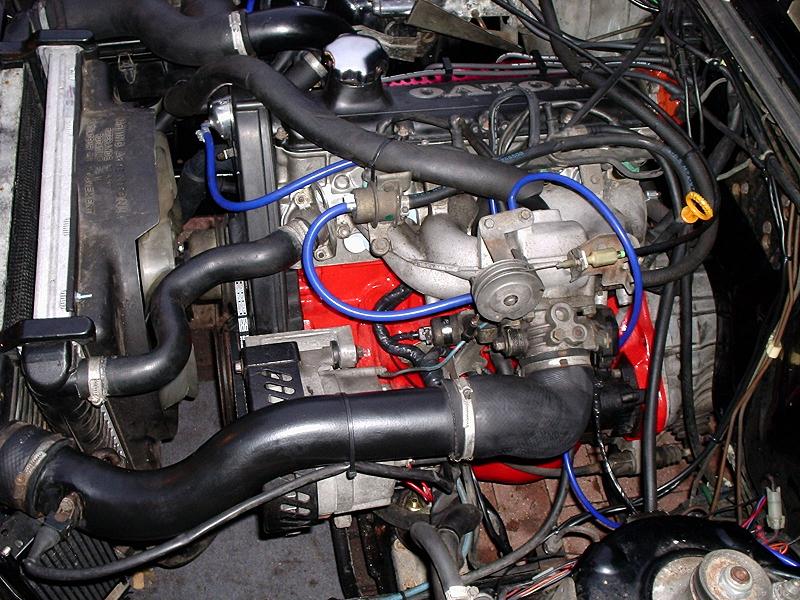
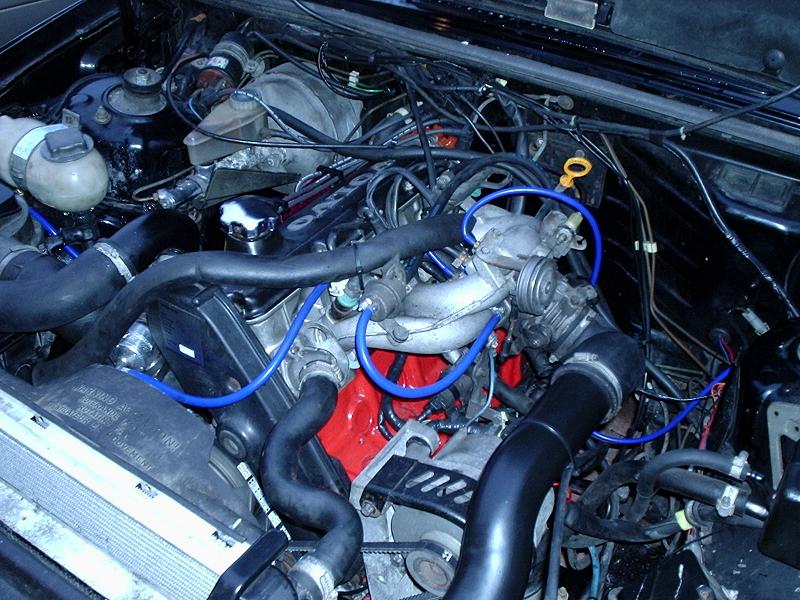
Hour or so later, i have a brand new Spankers T3 bolted onto my ported out early style manifold. New Water Coolant pipes, and drain pipes are also installed.
I do a few last minute changes to some water pipes on the turbo side of the engine and its time to slip the manifold on. Just needs bolting down then i'll install the oil feed pipe.
so thats where we are at the moment, tommorrow should see the camshaft installed, the last few ancilliers installed and then its new engine up on the engine crane for flywheel and clutch install and then marrying up to the repaired m90 and the lot dropping back in.
Maybe tommorrow night it'll be running or poor Foggy will be made to earn his board when he stops over saturday night and help me put the last of it back together on the sunday.
Now some random pics from today
LETS OFF ROAD
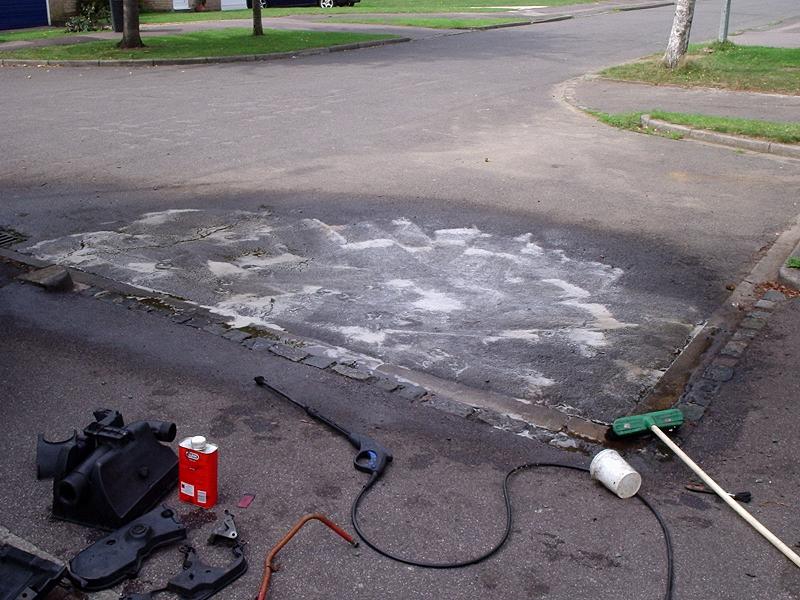
MY neighbours love me, here is my degreasing bay.
Day 5 begins with it raining on and off.
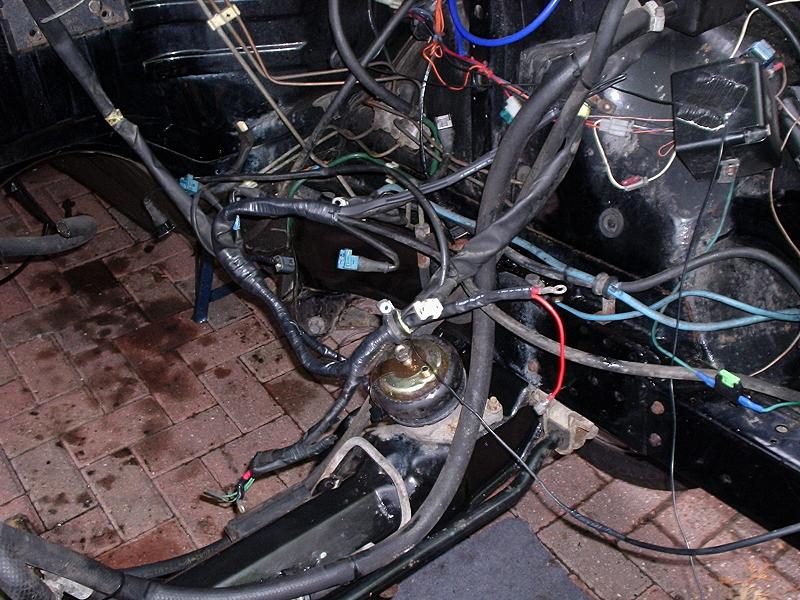
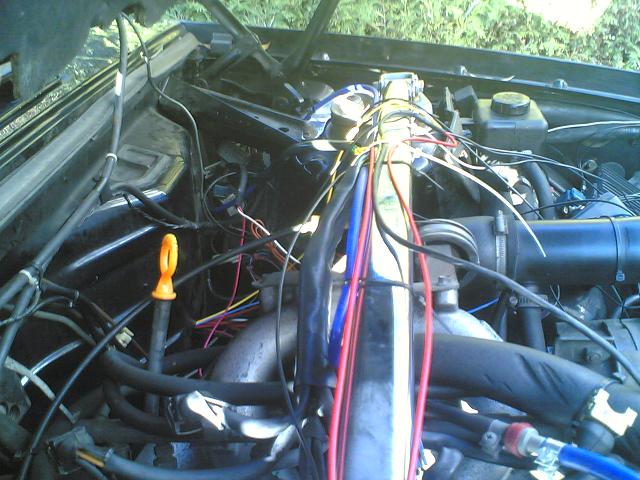
So with a fishing umbrella in hand, i step into the engine bay and repair the wiring harness.
There were broken sensor wires shorting each other out everywhere, but after a couple of hours i had everything sorted and i rewrapped the loom so it looks pretty presentable.
Then i went back to cleaning up some more bloody parts before installing them on the engine. I didnt take any pictures cos i didnt feel like i've made much progress.
But the engine is now complete, Installed the Cam, and all the other left over stuff and my dad even made it a bit ricey with a bolt on part he found in the garage (you'll have to wait for tommorrows pics)
So tommorrow, the engines going up on the crane and the flywheel and clutch and m90 will be hung off the back and it'll be dropped in and then everything hooked up, so we should have a running car tomorrow.
Oh as for the broken M90, well i had a few goes at repairing it, and well this time it seems to be holding quite nicely. I used a mouldable putty that sets like steel in 10mins.
Day 6
Final wiring repair in the engine bay is compled and i installed a new Downpipe Heat shield.
Some last minute gratusious shots of the engine on the stand.
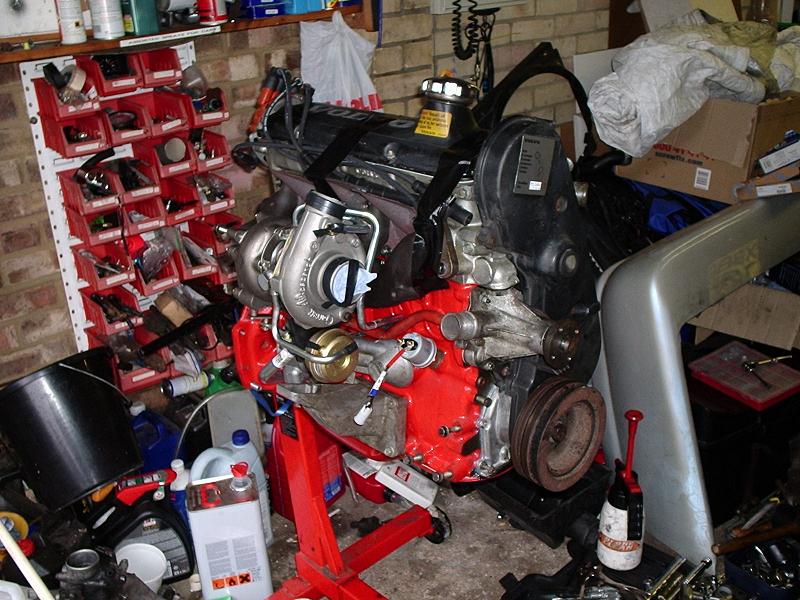
Then it came of the stand after being on there for the last 3 years and the Flywheel and clutch were installed and the M90 Bolted on.
Then a quick bit of jiggery pokey and the engine and gearbox were installed in the car.
Below foggy is fiddling with something just moments after its dropped in.
Then it was the lovely task of just hooking everything back up.
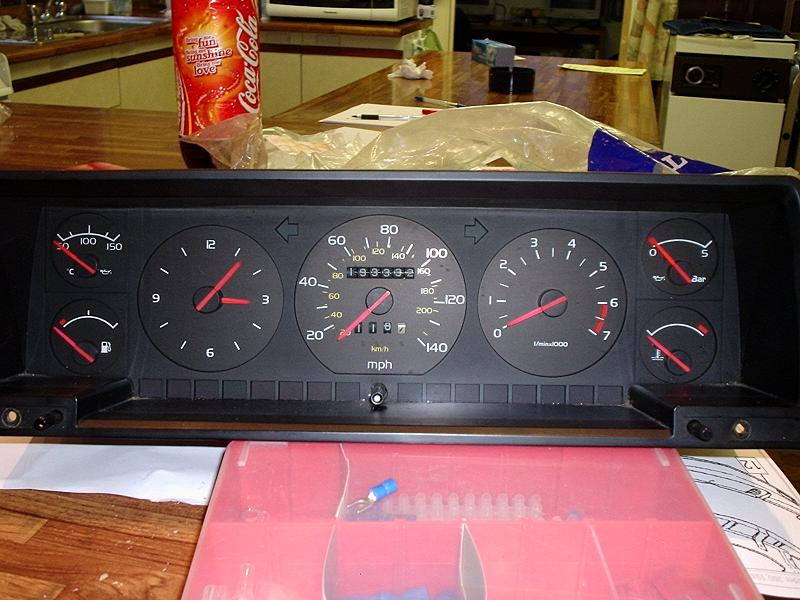
Foggy went off and found his own version of heaven by installing some new gauges in the cluster so that a close eye can be kept on the new engine.
And so the process off reinstalling bits carried on.
We had some fun and games after reinstalling the front bodywork and the left hand side bonnet release mechanism. The bonnet wouldnt bloody open, but after a good 15mins faffing about it was all good and we could carry on with the final hook up.
Then finally everything was hooked up, fluids were added, and there were no leaks without the car running.
Then it was time to fire the car up. Check its in Neutral, Turn key to stage 2, then stage 3.
Absolutey bugger all.
So out came the multimeters, then the battery came out of the estate as we suspected with the engine being so tight the starter was struggling.
still Nowt, then a quick check off the starter on the estate revealed we'd put the signal wire on the wrong connector. Swapped over and fired first time.
Ran it up for 15mins to get up to temp, rechecked all fluid levels, not a single leak anywhere.

Then we took it out to get a chinese in it, No not run a oriental person over, but some food.
The car drove fine and stock boost level is around 6psi climbing to 7ish under load.
Fitted a New Chrome Style Strut Brace for some added bling and to tighten the front suspension up.
About 800miles into the running in of the new engine, i decided to sort the
valve clearances out as they were a bit noisy, now seeing as i was going to
have to take the cam out to change the shims, i thought it was wise to stick
a better cam shaft in there.
So a Enem V16 Turbo Cam was aqquired and fitted. The clearance were set to 0.35 all round. This cam has a performance range of 2500-6500 Rpm's. Currently the Stock Motronic 6200rpm limit interferes but Megasquirt will get round this, but this cam really does help the engine pull hard all the way to the rev limit.
December 2005
I made a quick loom one Saturday morning and test fitted the Megasquirt ECU system to the car with the help of a friend Nick who sorted out all the software side to the Megasquirt system.
The car started first time!!!!!
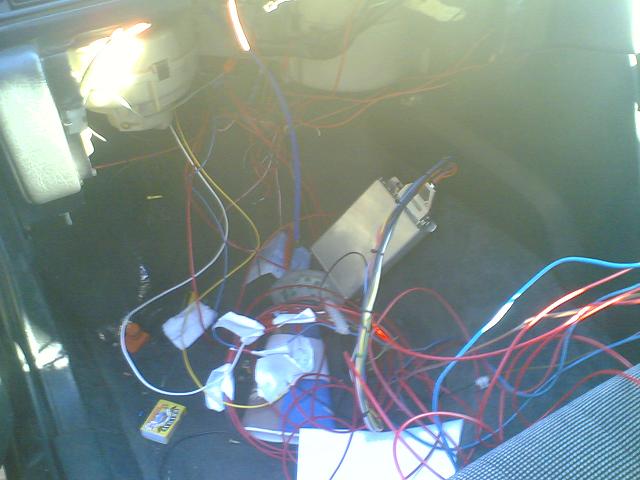
This is what the quick loom i made looks like off the car.
I've now removed this Rats nest of wiring and the cars back running on the standard ECU system, whilst i remake this loom into something that looks very factory in appearance.
I'm also part way through building a DIY Wideband Fueling Montioring kit which will be essential in the tuning of the Megasquirt system, so until thats also completed thats as far as it can go.
March 2006
Still no progress on the MS install yet, work has taken up too much of my time recently, however with the TurboR currently returning around 18mpg regardless of how its driven replacing the crappy old motronic ECU system with MS and tuning it for economy might speed up my progress on this part.
But this month I was invited to a Magazine shoot entitled 80's Exective Turbo Thrash for Retro Cars at Bruntithorpe, all in all a great day out with plenty of time spent thrashing the TurboR round the track, which so large its unbelievable.

The Magazine is now out its The May 2006 issue should you wish to purchase a copy.
Anyway after a few to many sideways antics at Bruntithorpe, Hairpin corner Video the old Jetex exhaust snapped off at a weld, so it was time to upgrade the exhaust again.
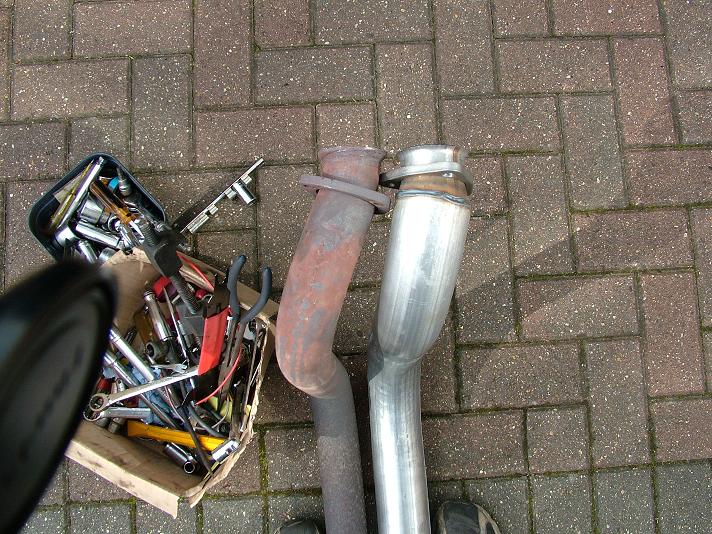
I chose a complete 3inch System from the Turbo back from JT Tuning in Sweden. The price including shipping was only £10 more than i had payed for my Downpipe back 2.5inch Jetex System.
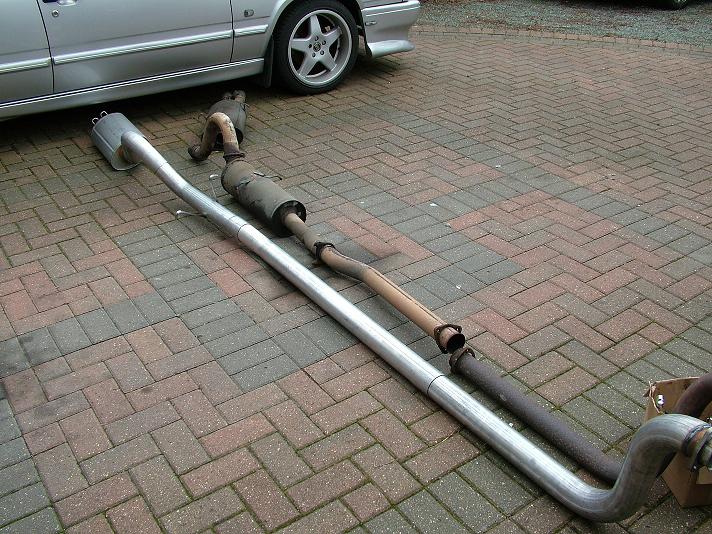
Now fitting it was bizzare, i lined the two systems next to each other to ensure the hangers were in the correct place.
But when i fitted the system to the car, all the hangers were about 2 inches too far back. So I lopped 2 inches of the downpipe and re hung the system and all the hangers matched up perfectly.
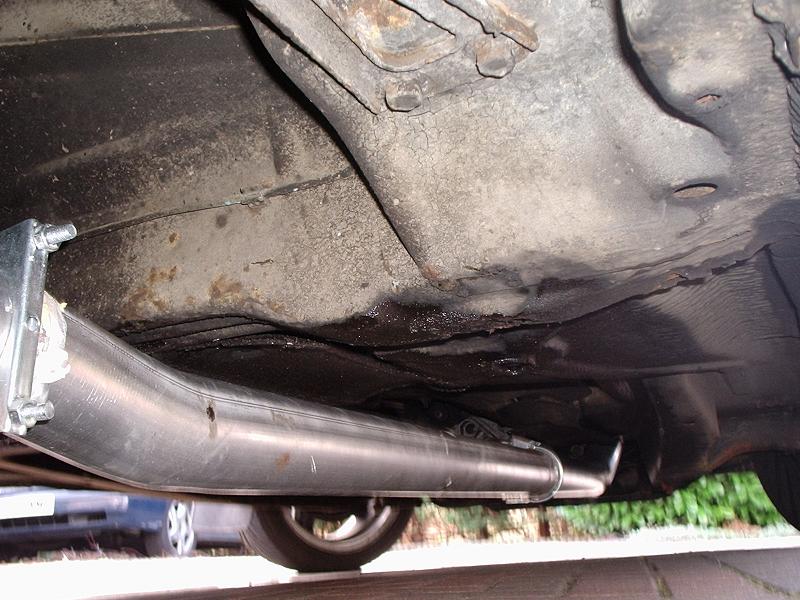
Took it for a test drive, well as soon as i started it up i got terrible vibrations through the steering wheel, so shut down and readjusted the downpipe and took it for a spin. As soon as i got on the power the engine would tilt over and the DP would hit the steering collom. Despite the DP being only 1-2mm from the engine. So i drove it for a few miles to let it mark the downpipe. Then i removed the entire system, heated up the part it marked and then with a pipe and a BFH put a collom sized dent in there to give me the clearance.
![]()
RHD Sucks, one of the only times i've wished for LHD, but hey its all good now.
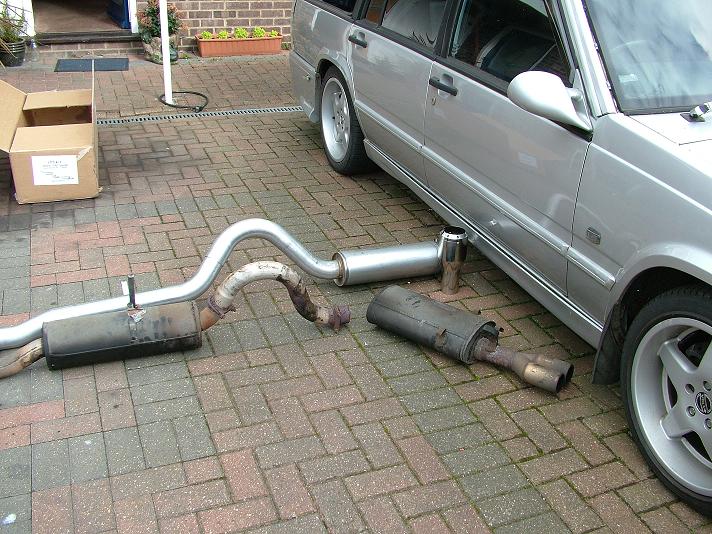
As you can see below the standard downpipes kick the pipe well over to the engine to help us poor RHD guys out, but of course JT markets to the majority so i doubt they ever product tested it on RHD.
Yes I love having a car thats old enough not to require a Cat for emmissions or reductions in exhaust flow.
The only sad thing about the kit is the Exhaust tip thats supplied. JT advertise it as a no cost option for the kits, but i didnt specify it, i just wanted the pictured standard 4 inch rolled tip. But they are obviously struggling to get rid of what i call the Gay Tip.
But Avert your eyes from the pic below, for it its truely is a hideous tip.
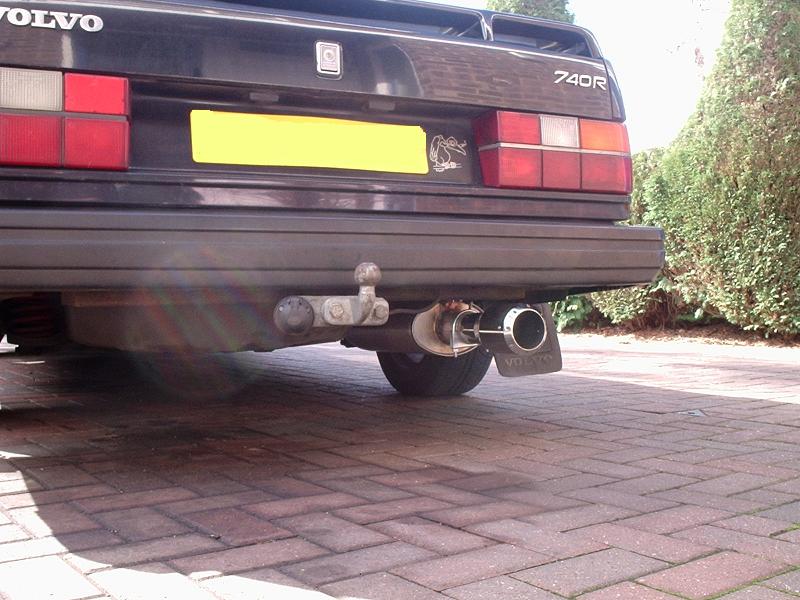
So i tried it on for looks, but i was getting too many Corsa's and Saxo's following me and giving admiring glances,so a quick session with the drill and the two rivots that held the alumminon end bit in and it was off. I've now made it into a very nice ashtray and the car just has a very plain 4 inch exhaust, which i'll probably just subsitute for some 3inch pipe when i've got some time.
April 2006
Well decided to go along to Volvo Tuning with the Volvo Performance Club UK forums for a dyno day.
Before driving up there I switched out my Superchipped Ecu and replaced it with my BSR chip after talking to some swedes who said that the Superchip version was a pile of shite and did not concentrate much on the ignition maps, they just chucked extra fuel in.
Upon driving the car up there, i could feel a difference in low down power on the old butt dyno.
Here was the result, 229RWHP and 315NM or 232lb/ft of torque.
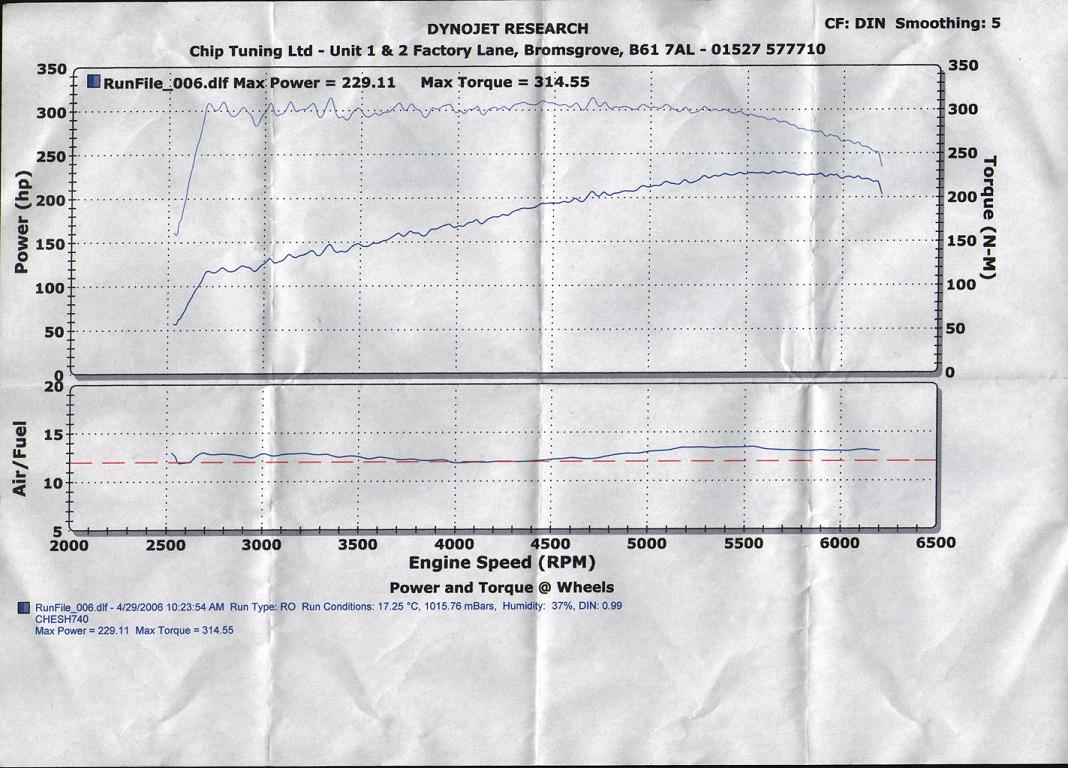
Heres a little vid of the car doing its runs, Dyno Runs , I am extremely pleased on the power figures, but the torque graph is really phenomal, most other 8v engines i've seen the torque comes up in relation with the power and then tails off over 4k, this one just gets high and stays high.
June 2006
On the way back from the VOC BKV meet the car didnt seem happy, i just put it down to it being a warmish day and intake temps were high and hurting performance, anyway a brand new BMW M3 cut me up in such an arrogant way I thought this guy needs to be taught a lesson, so I flicked the EBC to high boost and went for it on the dual carriageway, he was really trying but I was passing him when there was a sudden flutter from the engine and a loss of power and then a large mettalic hammering sound from the engine. Switchhed the engine off and coasted to a stop.
I had plenty of time whilst waiting for the recover truck to pick me up that I checked the engine over and could find no Oil Loss, No water Loss, no Leaks anywhere, no holes in block, Cambelt still intact.
March 2007
I had left the car dead on the drive for 9 months as work had delayed me from playing with it and i knew that it was pretty much terminal damage to the engine.
I pulled the engine from the car and put it on the stand
Started by pulling off the sump to have a look at the bottom end as that was where i was suspecting the damage to be, did that and could find absoutley nothing wrong,so sump went back on.
Next I pulled off the cambelt covers, and after checking several times ( the timing marks on the aux belt pulley didnt line up) I made sure that the Cambelt Timing was spot on and the failure wasnt due to a slipped belt.
Next i pulled the Inlet manifold off and found nothing amis.
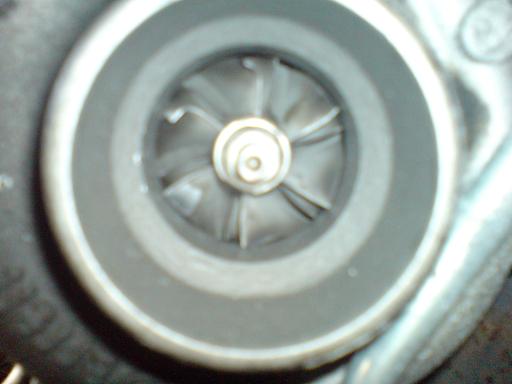
Then i pulled the turbo off and noticed that 2-3 blades were damaged, yet the turbo spins fine, no damage in the shaft.
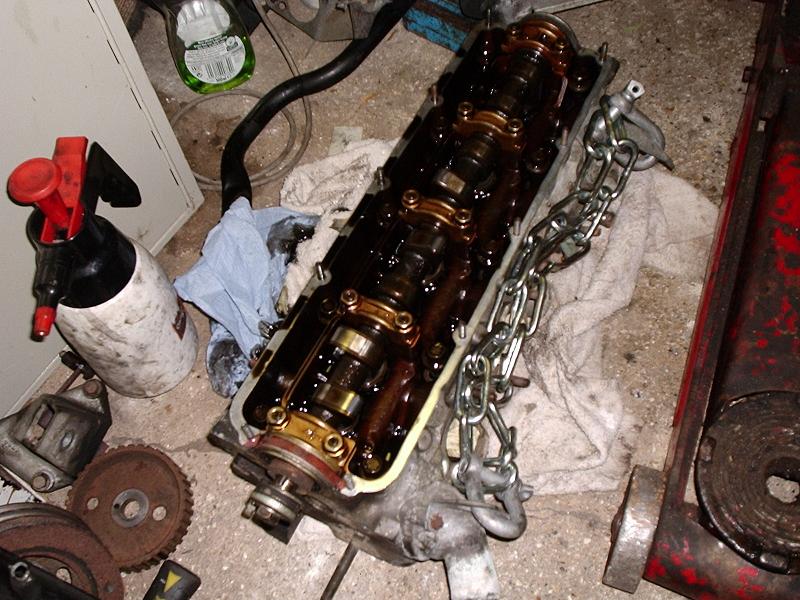
Then after pulling the rocker cover and seeing that the cam was operating the valves fine when the engine was turned over, I decided to pull the head.
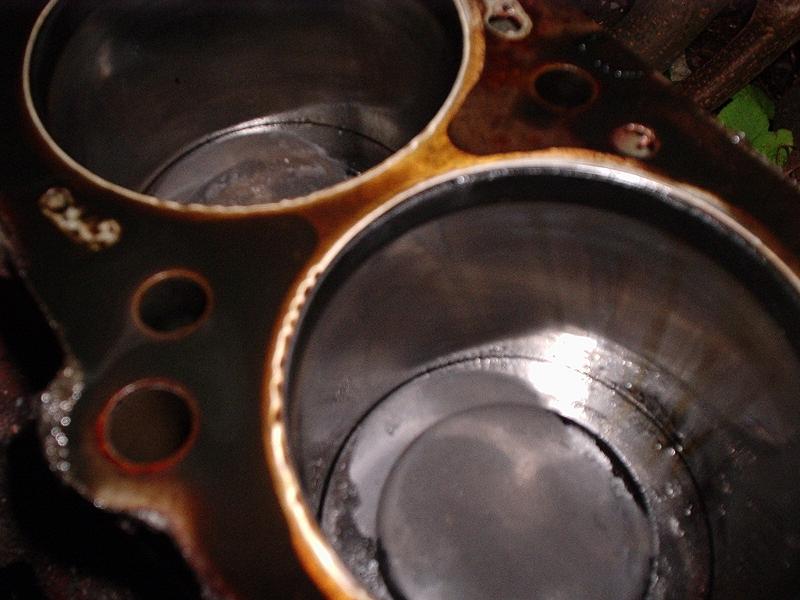
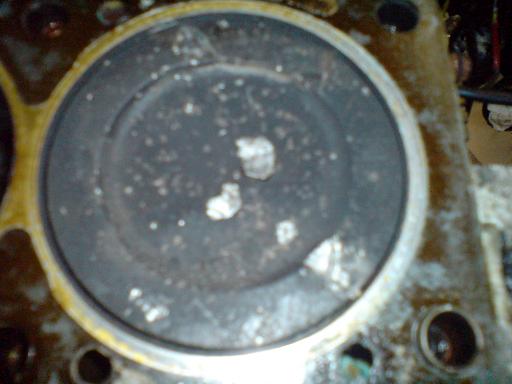
This is what i was greeted with.
Number 1 piston with some Foreign Object that has been bounced around.
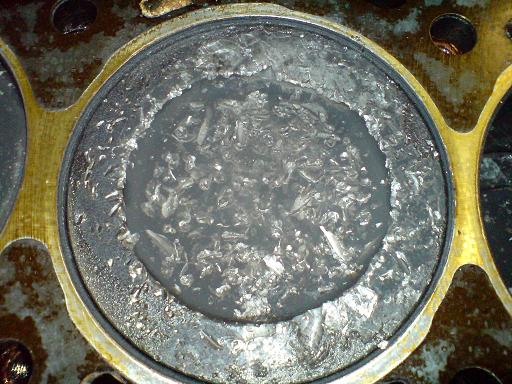
Number 2 Piston had substantial damage.
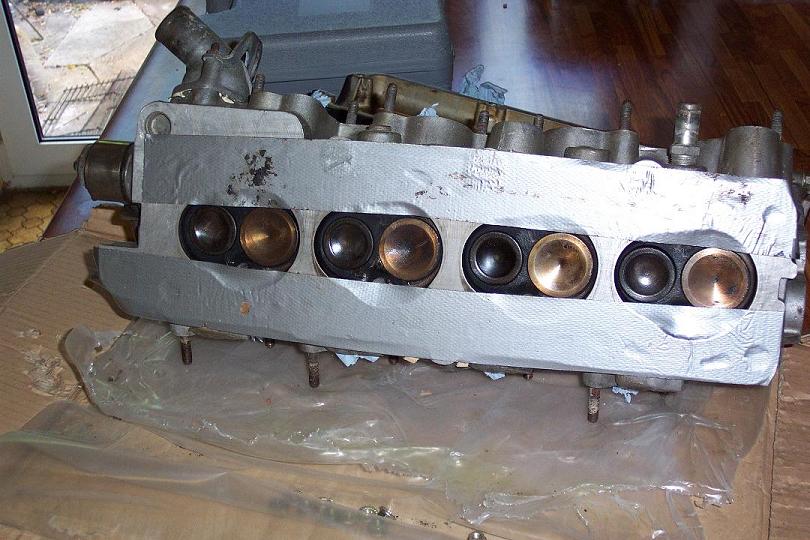
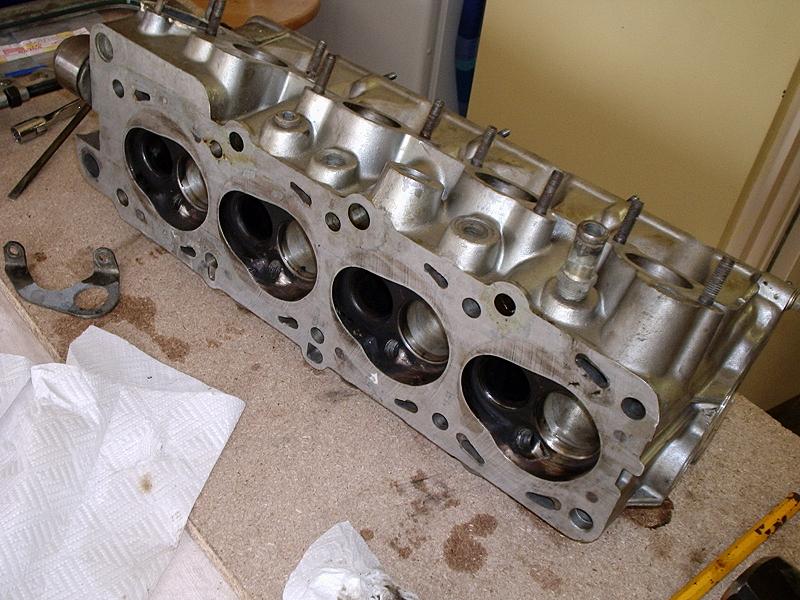
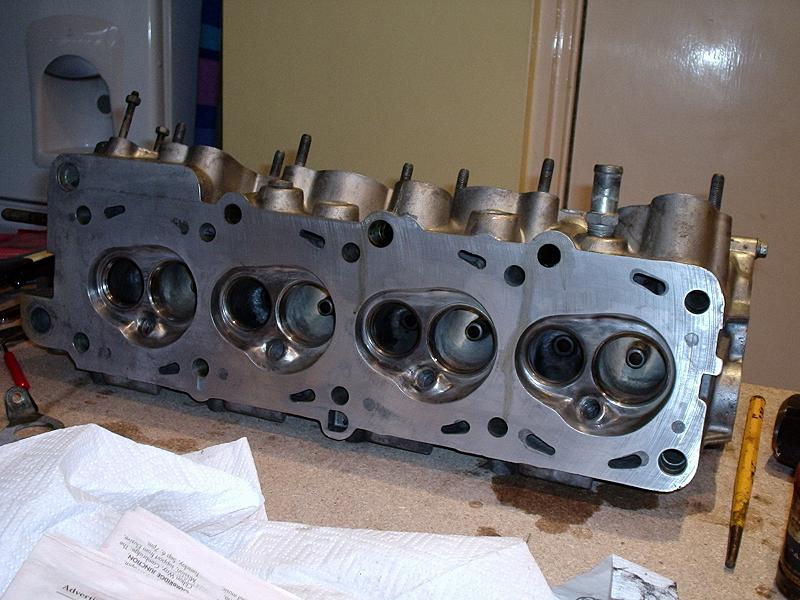
So i carried the head to the kitchen table and turned it upside down.
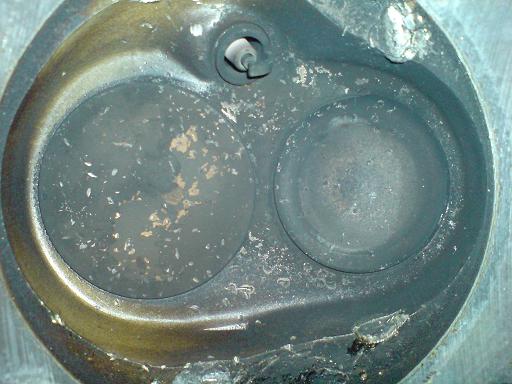
Number 1 CC & Valves, slight ding from the Foreign Object and some light bouncing.
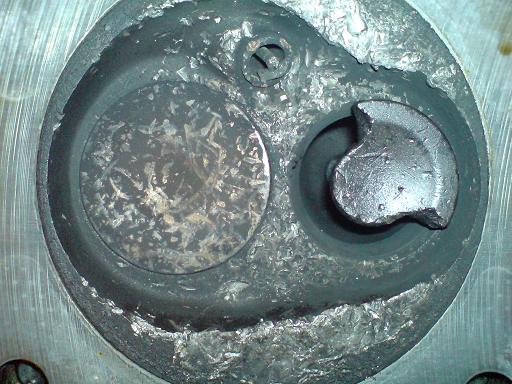
Number 2 CC & Valve & whats left
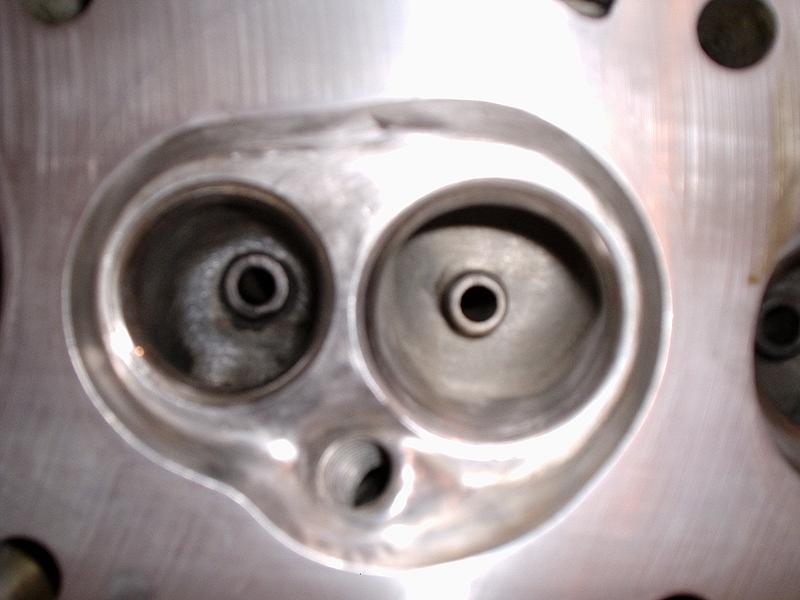
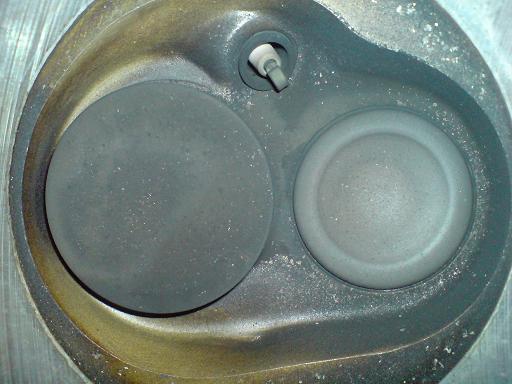
Number 3 CC & Valves, all seems well.
Number 4 CC & Valves, note the fine crack appearing in the Exhaust Valve
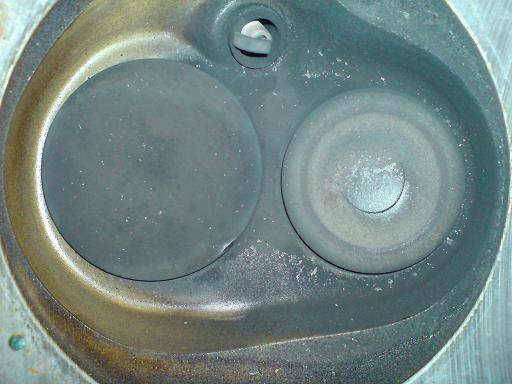
The conclusions drawn were that the bigger Valves that were used were not up to the heat generated and so prematurely failed
So that is where the Project TurboR ends.
April 2008
Quite a while has passed, but in that time parts have been collected and ideas formed, watch the website for new and differently titled project page coming soon